 |
| Visitor Management System: Scan QR Code for Pre-Registered Visitors |
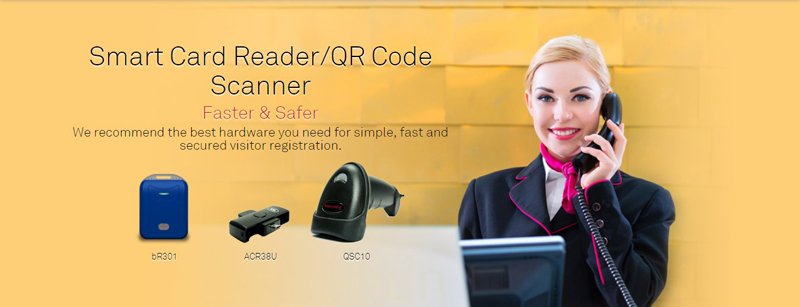
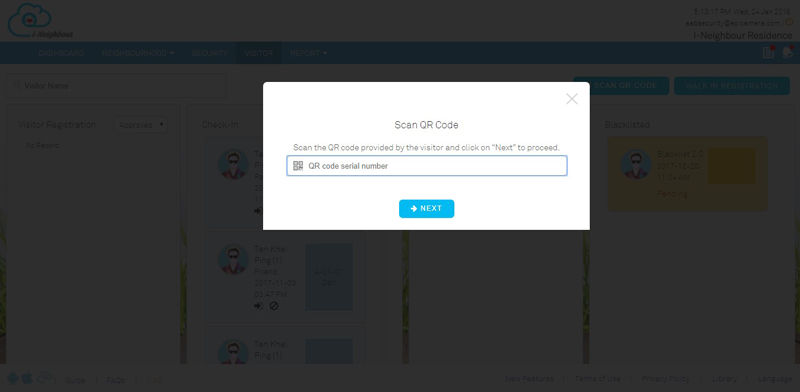
| During check-in process, the security guard is allowed to scan the pre-registered visitor’s QR code by using our recommended QSC10 QR Code Scanner in order to confirm the visitation. What’s more, this feature also helps to reduce the visitor’s registration time and speed up the entire check-in process.
View more details on QSC10 QR Code Scanner at this link. |
|||
 |
|||
 |
| Visitor Management System: Blacklist Visitor |
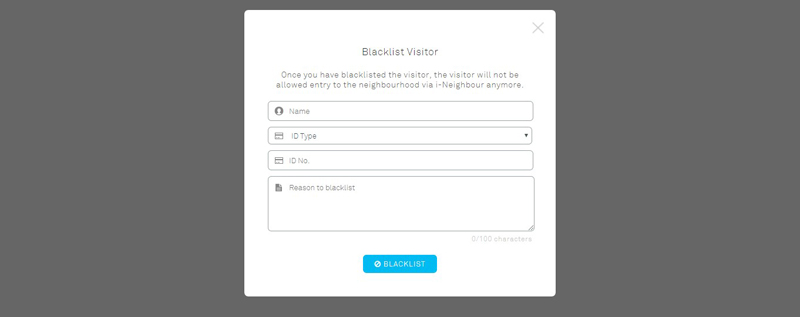
| Administrators can now blacklist visitor by keying in the Visitor’s Name, ID No. and Reason. Additionally during check-in or walk-in registration process, the system will now perform verification on the visitor’s blacklist status and prevent any blacklisted visitors from checking-in to the neighbourhood.
For more details, please click on this module at the top menu bar: Visitor > Blacklist Visitor. |
|||
 |
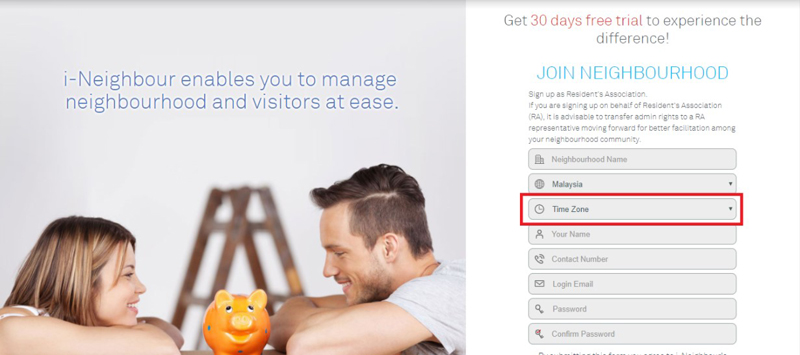
| Neighbourhood Sign Up Form: Time Zone Settings |
| While performing the neighbourhood sign up process, administrators are now able to set the neighbourhood time zone according to their countries. Note that the preset time zone can still be edited if the chosen time zone is wrong.
Go to Neighbourhood Profile, tab on Edit icon at the top right, and proceed with the selection on time zone accordingly. |
|||
 |
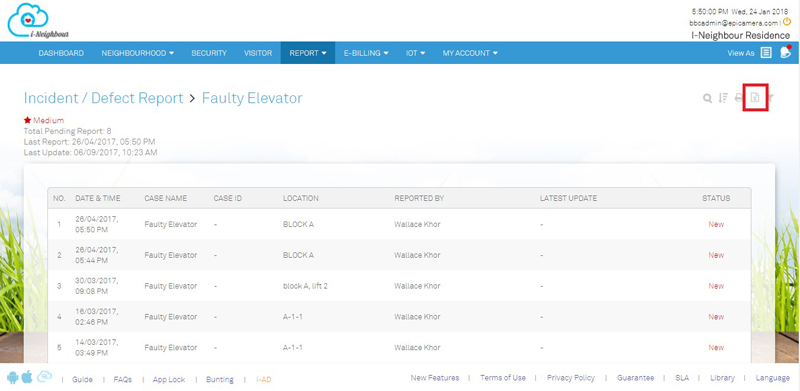
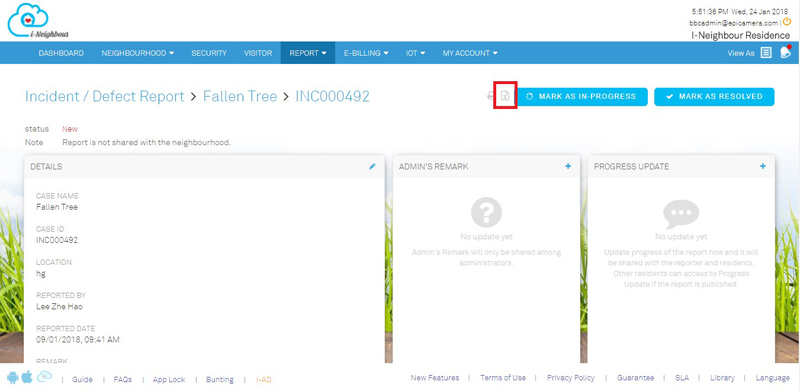
| Incident/Defect Report: Export to Excel Features |
| Export to Excel feature has been added into Incident/Defect Report module. Therefore, Administrators are now allowed to export the Incident/Defect Report Listing and the details by clicking on “Excel” icon located at the top right.
Note: Once exported, the file will be downloaded as an excel file into the local storage. |
|||
| 1. | Incident/Defect Report Listing: | ||
 |
|||
| 2. | Incident/Defect Report Details: | ||
 |
|||
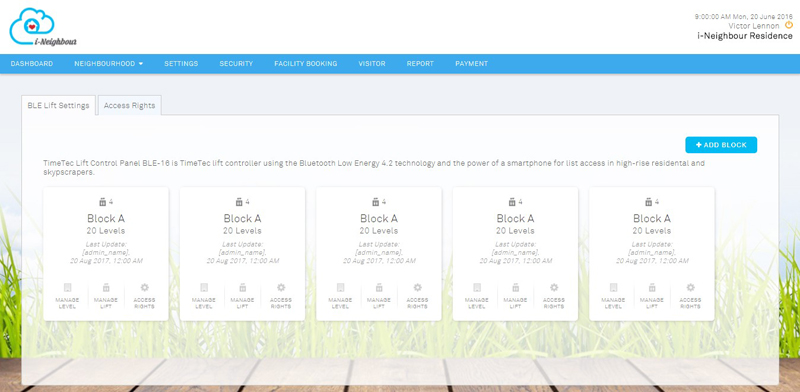
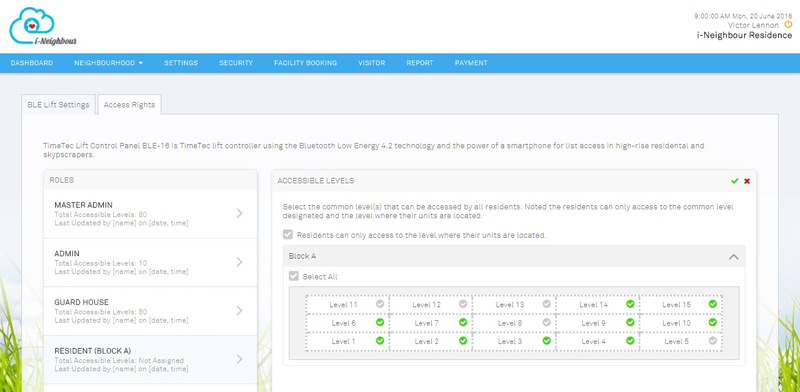
| BLE-16 Lift Access |
| TimeTec Lift Control Panel BLE-16 is a lift controller which utilizes Bluetooth Low Energy 4.2 technology and the power of a smartphone for lift access in high-rise residential and skyscrapers. Administrators can now add in the BLE-16 technology within i-Neighbour system for a more secure and convenient environment.
Besides, the Administrators are also able to control the accessible rights into specific floors by defining the access rights for the user roles such as Master Admin, Admins, Security Guards and Residents. Sample screenshots are shown as below: |
|||
| 1. | BLE Lift Settings | ||
 |
|||
| 2. | Add BLE Lift | ||
 |
|||
| 3. | Access Rights | ||
 |
|||
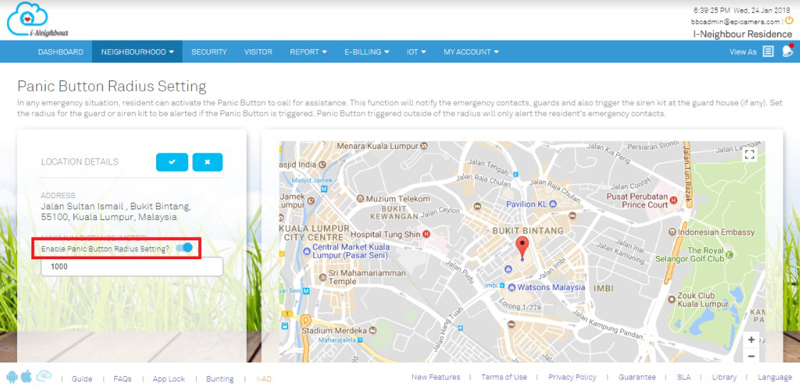
| Panic Button Radius Settings |
| Panic Button Radius Settings allow the Administrators to set the distance for the guards to be alerted if the Panic Alarm is triggered within the preset distance. Furthermore, a Disable function is also added for neighbourhoods whereby this settings is not applicable.
Note that if the Panic Button Radius Settings are disabled, the Siren Kit and guards at the guard house (if any) will still be alerted even if the residents trigger the Panic Alarm outside of the neighbourhood compound. |
|||
 |
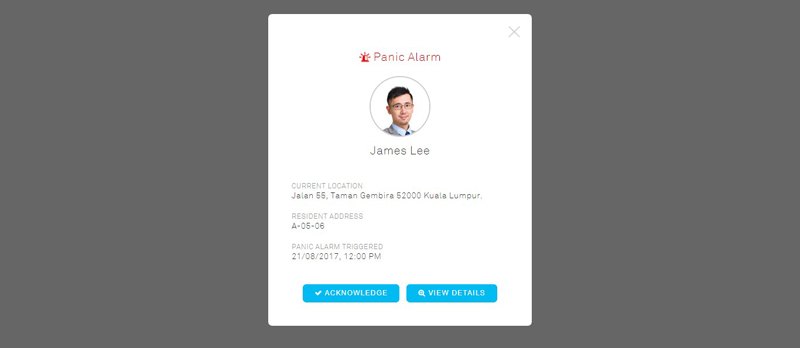
| Panic Alarm Alert Pop Up |
| In case of an emergency, the security guards will receive a Panic Alarm alert whenever the residents trigger the Panic Alarm. This is to help inform the security guards and allow them to respond accordingly at the shortest time.
Besides, the security guards are now able to view the full details of the emergency event by clicking on “View Details”, without proceeding to the Emergency Event History module. |
|||
 |
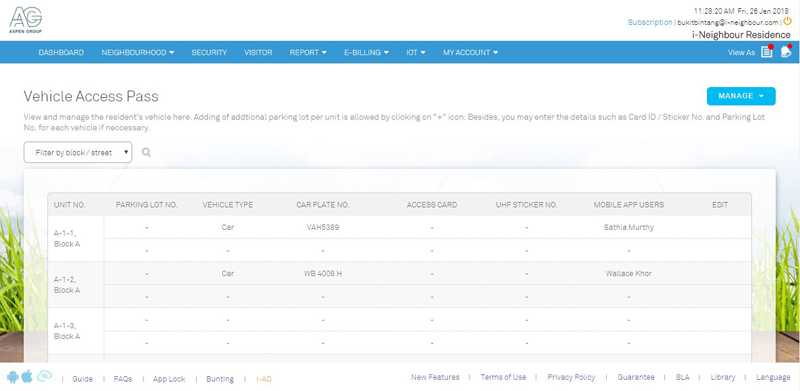
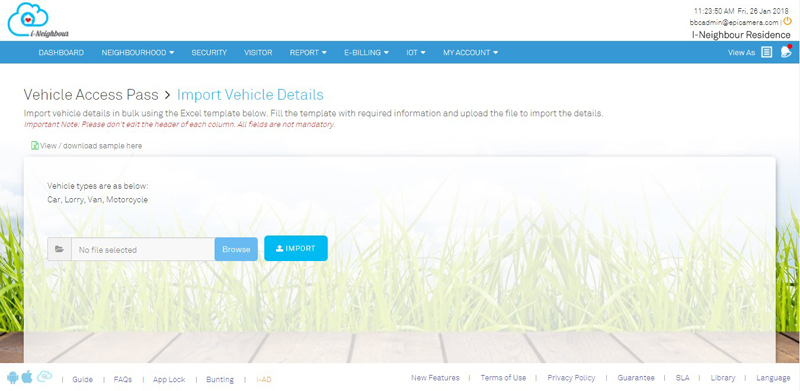
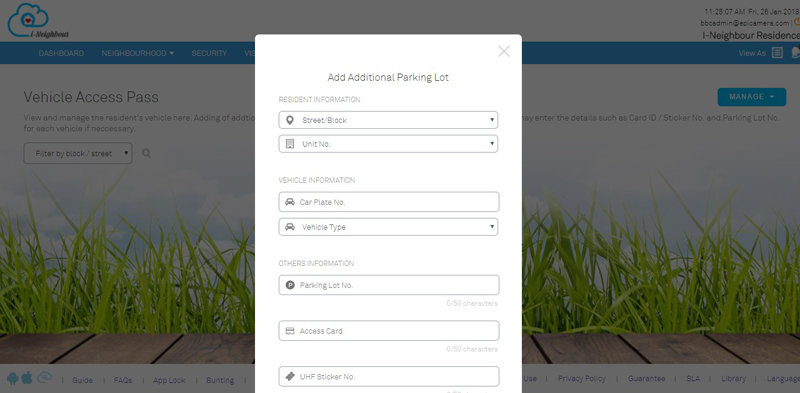
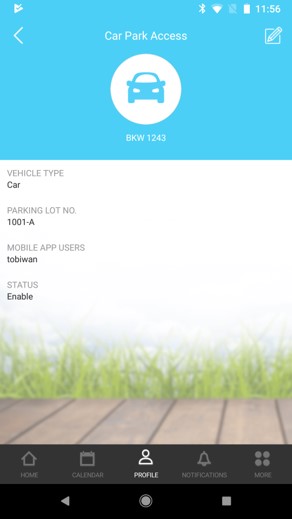
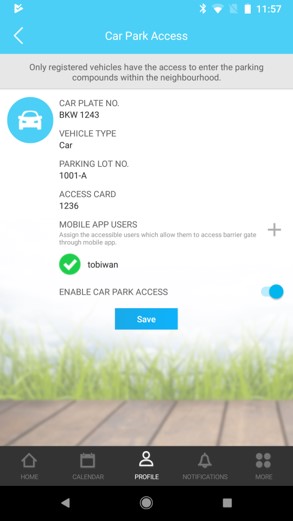
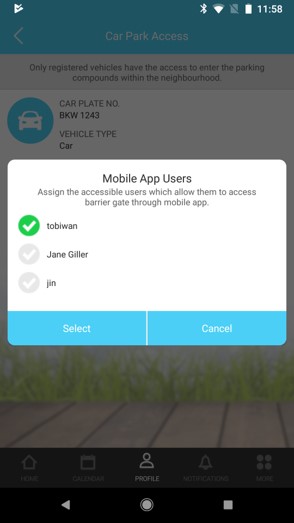
| Vehicle Access Pass |
| This module allows the Administrators to view and manage the resident’s vehicle and parking lot access. By default, the number of parking lots per unit will be tabulated according to the initial configuration. Note that the adding of additional parking lots per unit is allowed by clicking on the “+” icon. Besides, the Administrators may also enter the details such as Card ID / Sticker No. and Parking Lot No. for each vehicle if necessary.
Please import vehicle details in bulk using the available Excel file to ease the Administrators in importing all of the vehicle details into i-Neighbour system. For more details, please click on this module at the top menu bar: IOT > Vehicle Access Pass. |
|||
 |
|||
 |
|||
 |
|||
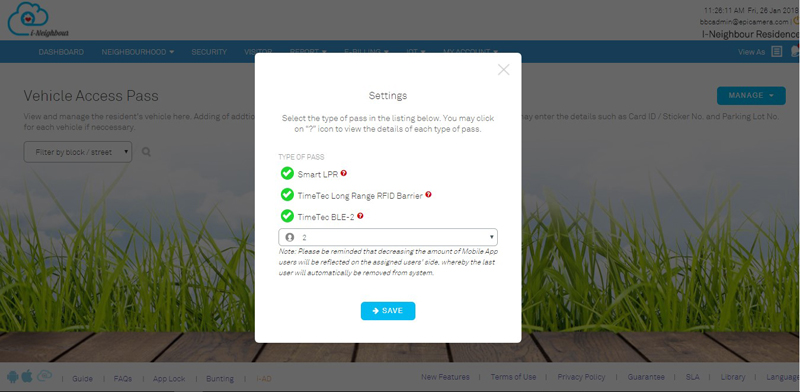 |
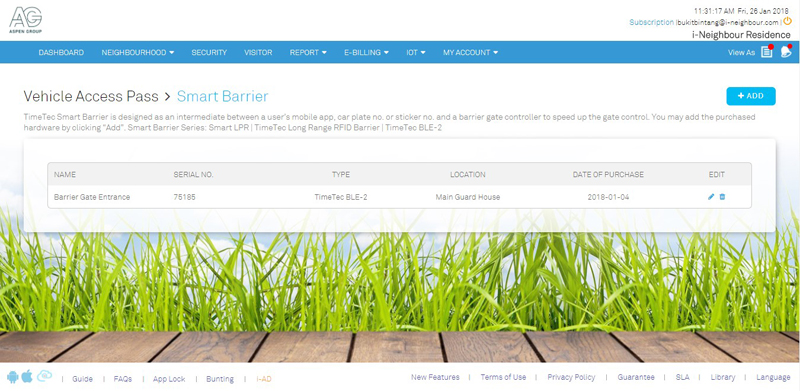
| Vehicle Access Pass: Smart Barrier Gate |
| i-Neighbour system supports the integration of three different types of Smart Barrier Gate, which are TimeTec BLE-2, TimeTec Long Range RFID Barrier and Smart LPR. The Administrators are allowed to install any type of the above mentioned Smart Barrier Gates within the neighbourhood to monitor the in-out access of vehicles as well as restrict the number of parking lots available per unit.
View more details of Smart Barrier Gate at TimeTec BLE-2 | TimeTec Long Range RFID Barrier | Smart LPR. Sample screenshots are shown as below: |
|||
| 1. | Smart Barrier Gate Listing | ||
 |
|||
| 2. | Add Smart Barrier Gate | ||
 |
|||
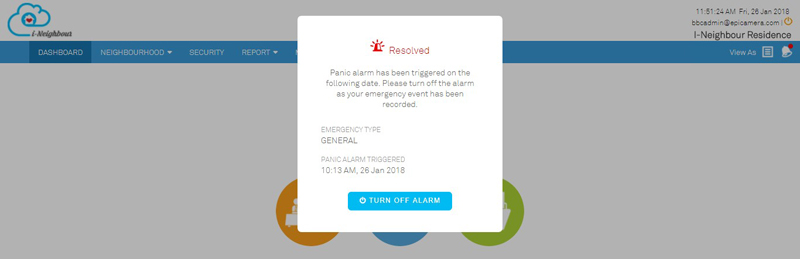
| Turn Off Panic Alarm Alert |
| Residents will now receive an alert message whenever they forget to turn off the Panic Alarm after triggering it. This helps to ensure that the Emergency Event Detail is recorded properly. | |||
 |
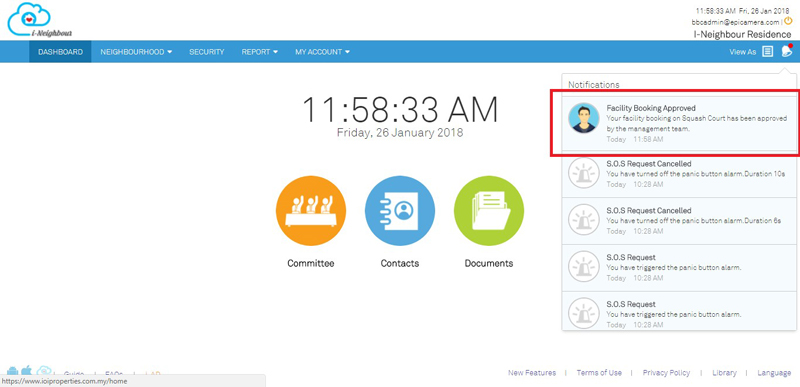
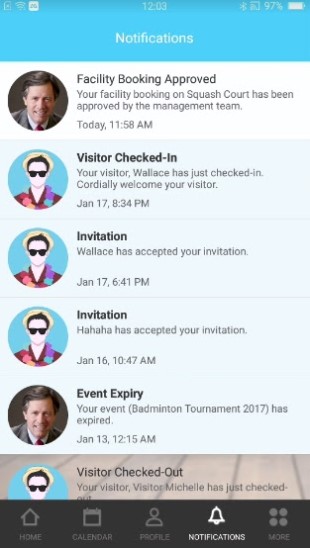
| Notification Center: Approved/Declined Facility Booking |
| Through Web Portal, residents will now receive a notification whenever their booking has been approved or declined by the Management Team.
Click on the “Notification” icon at the top right to view the list of notifications. |
|||
 |
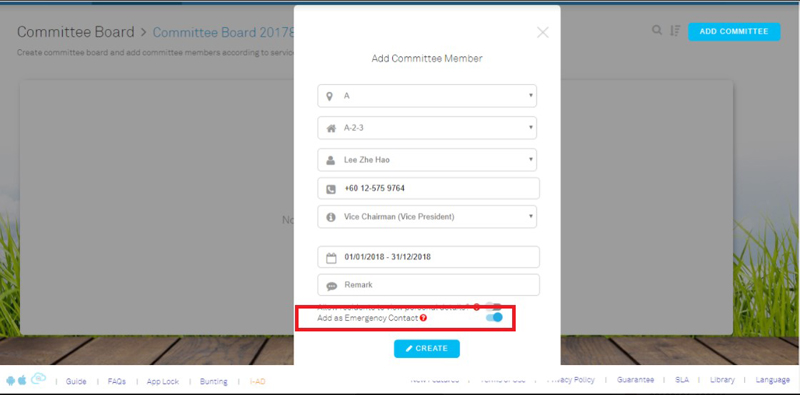
| Add Committee Member as Emergency Contact Person |
| Administrators can now assign Committee Members as Emergency Contact Person. The assigned Committee Members will then receive the Panic Alarm alert whenever residents trigger the Panic Alarm. This is to help alert the committee members and allow them to respond accordingly. | |||
 |
| i-Neighbour App Updates |
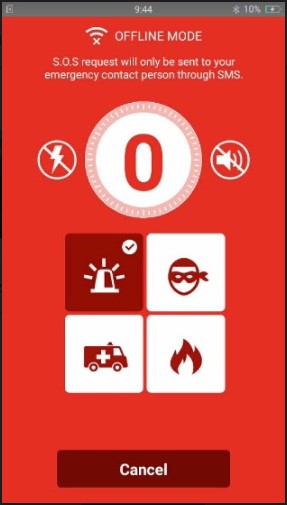
| 1. Offline Mode | |||||||
| ● | Admins and Residents can now still access Smart Access, Lift Access (if applicable) and Panic Button (for Resident) even though there is no Internet connection. | ||||||
| ● | When there is no Internet connection, the system will prompt a “No Internet Connection” message to alert the users. Subsequently, users are allowed to access Offline Mode by clicking on “Go Offline” at the top right corner. | ||||||
| ● | Alternately when the Internet connection is back, users can click on “Go Online” and will be directed back to normal mode. | ||||||
|
|||||||
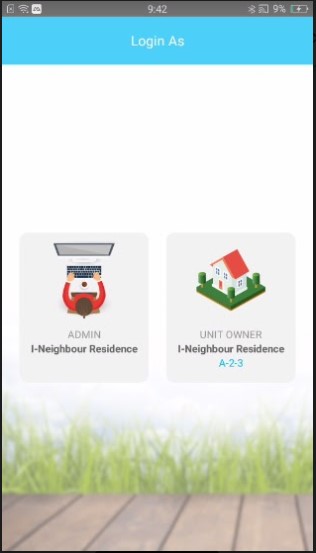
| 2. Multiple Accounts Login | |||||||
| ● | UI has been enhanced to ease users with multiple roles. | ||||||
| ● | “Admin” icon indicates the user with the Admin’s role in the neighbourhood while “House” icon indicates the Unit Owner or Resident’s role. | ||||||
 |
|||||||
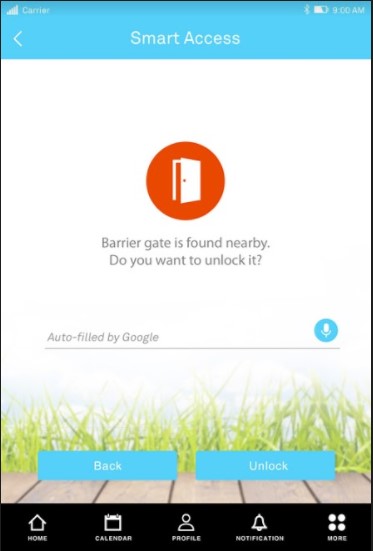
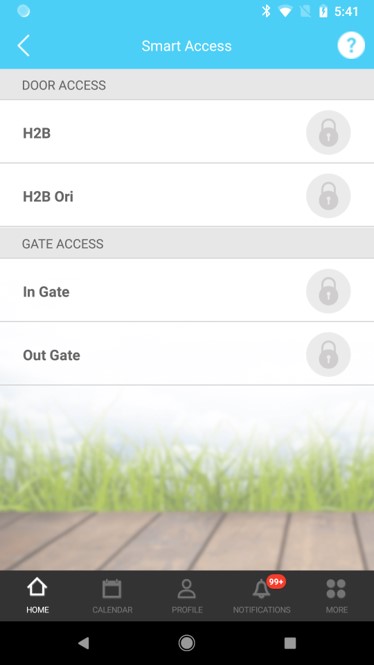
| 3. Smart Access | |||||||
| ● | Door Access and Barrier Gate Access has been combined to allow residents to perform entry access through Mobile App without having to switch module or use any cards/keys (if applicable). | ||||||
|
|||||||
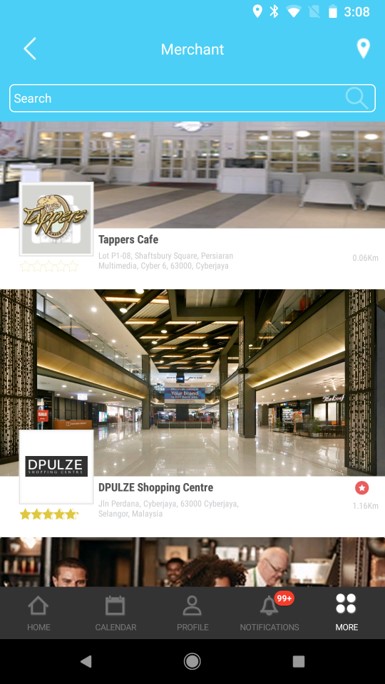
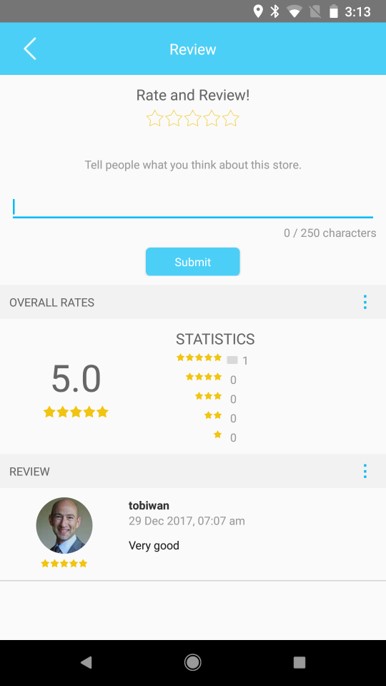
| 4. i-Merchant: Store Review | |||||||
| ● | Store Review is now available for residents to rate and add comments on the selected stores in i-Merchant. | ||||||
| ● | To review the store, kindly go to i-Merchant > Select Store > Store Details > Review. | ||||||
|
|||||||
| 5. iPhone X User Interface Enhancement | |||||||
| ● | For all the iPhone X users, user interface (UI) has been enhanced to match the screen size. | ||||||
|
|||||||
|
|||||||
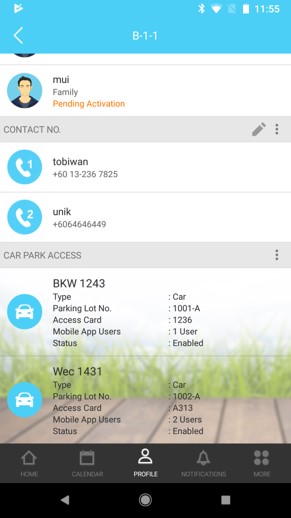
| 6. Manage Vehicle | |||||||
| ● | Through Web Portal, Administrators are now allowed to configure the settings and assign parking lots for each unit at Manage Vehicle Pass module. | ||||||
| ● | For the assigned parking lot residents, users can now view their assigned car park access through My Profile > My Unit module. | ||||||
| ● | The displayed information includes Car Plate No., Car Type, Parking Lot No., Access Card and Mobile App Users (if applicable). | ||||||
|
|||||||
|
|||||||
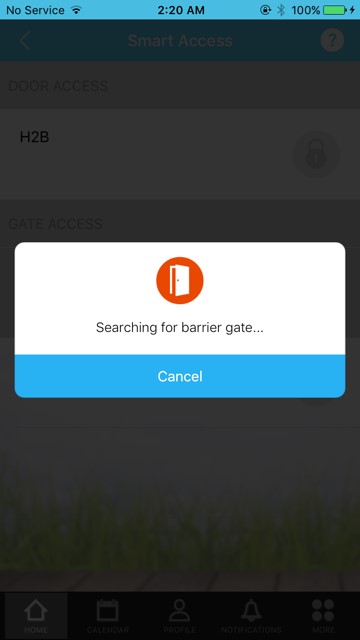
| 7. BLE-2 Voice Command | |||||||
| ● | Auto detection at the Barrier Gate (BLE-2) is now available. For residents accessing via Mobile App, they can now control the Barrier Gate access through voice command all without having to touch the device. | ||||||
 |
|||||||
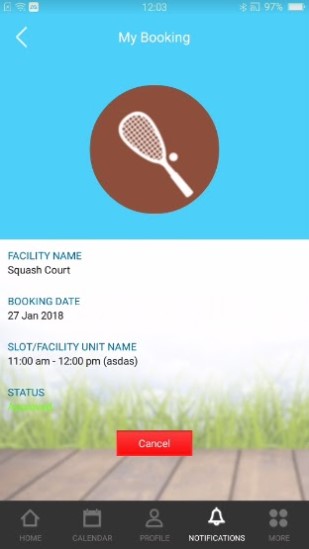
| 8. Notification Center: Approved/Declined Facility Booking | |||||||
| ● | Similar with Web Portal, residents can now view their approved or declined facility booking through the Notification Center. | ||||||
| ● | Besides, residents are also allowed to click on the event to view detailed information of the selected bookings. | ||||||
|
|||||||
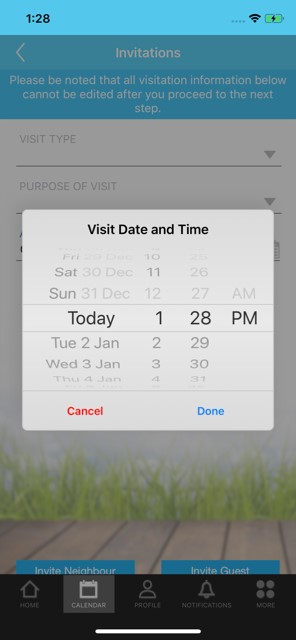
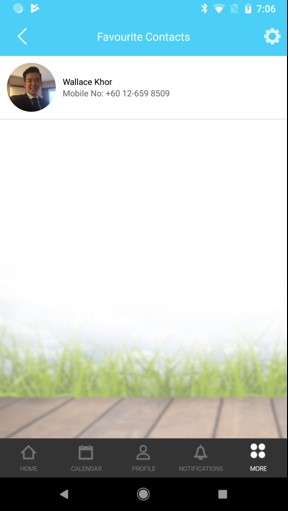
| 9. Favourite Listing | |||||||
| ● | Favourite Listing is now available for residents to favourite their visitors. Just go to Visitor Profile, click on “Star” icon and the visitor will then be saved in the Favourite Contacts listing. | ||||||
| ● | This module is to ease residents within the invitation and pre-registration process. Therefore, residents will only need to select the Invitation/Pre-Registration Type, Date and Time in order to invite/pre-register the visitors. | ||||||
|
|||||||


| Previous Issue: December 2017•November 2017 • October 2017 |
| Note: Some of the screenshots viewed here might be different from the ones in the current system due to our continous effort to improve TimeTec from time to time. |